My sister-in-law recently announced that she and her fiance are pregnant! It’s their first–a boy, due in June. We are sooo excited for them! And, since he’ll be pretty much exactly a year behind Wil, that works out great for passing on baby clothes…..
So, since I’ve been digging through baby clothes in anticipation of preparing a box to send, I thought I’d take the opportunity to share what I think is (and is not) necessary for baby’s wardrobe. I had so many more articles of clothing for Kaylie than for Wil! I found I really pared down my expectations for kid #2….So this is the bare-bones, what-do-I-really-need sort of list. Of course, every baby is different, and every mom is different, so these are just tips from my personal experience and preference.
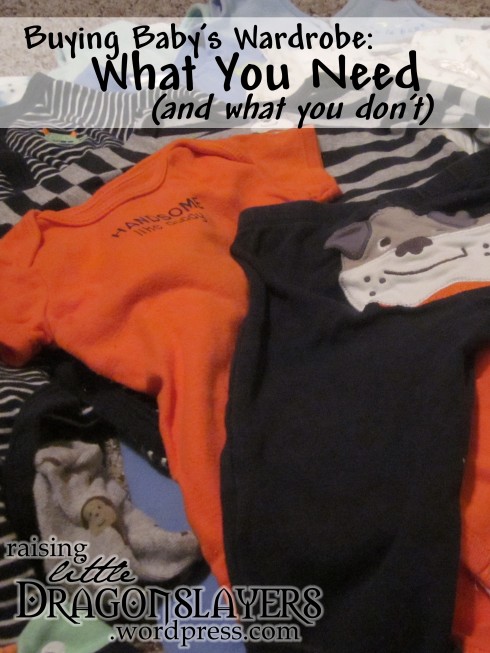
Buying Baby’s Wardrobe: What You Need (and what you don’t).
Here’s the quick list of what I think you ought to stock in each size for the first year:
- 6-8 complete outfits (long-sleeved and/or short-sleeved, depending on season)
- 3 cotton pajamas
- 2 sleep sacks (cotton and/or fleece, depending on season)
- 1 cotton jacket
- In cold weather: 1 fleece jacket/pants set
- 6 bibs
- 3 pairs socks
Always shop for complete outfits. It can be tempting to buy those adorable onesies in three-packs or that one that’s just so darn cute, but if you don’t have pants to go with them, they might never see any use (except, perhaps, in the heat of summer). I have found a good ratio to be three onesies for every two pairs of pants. For spring and fall wardrobes, Carter’s (my favorite brand for baby clothes) sells great three-piece sets comprising a long-sleeved onesie, short-sleeved onesie, and pants. And if you find one or more onesies that you just can’t resist, or receive any as gifts, you can usually track down a pair of jeans to go with anything. I shoot for 6-8 complete outfits in each size; I find I do laundry a little more frequently than once a week. You may need more outfits if your little one is a big spitter-upper, or if you don’t do laundry as often. Bibs can be a great outfit-saver, too, and they are a must for drooling, teething babies, or you will end up changing spit-drenched onesies (you wouldn’t believe how fast a teething baby can soak a onesie to the waist!). And, of course, socks–but not too many, because they never stay on anyway, so at some point you’ll probably give up on using them except when necessary.
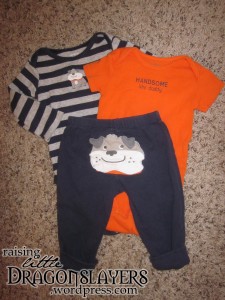
I love these three-piece sets for spring and fall!
Putting babies to bed with blankets is a suffocation hazard, so the alternative is wearable blankets. I prefer Halo SleepSacks. Always get two season-appropriate sleep sacks, because the last thing you want to deal with during a middle-of-the-night spit-up fest is laundry and nothing to put baby in in the meantime. For spring and fall, I always get two cotton and two fleece sleep sacks, and three pairs of cotton pajamas to go under them (for winter, I’ve also always had a fleece pair of pajamas on hand, but I rarely ever actually use them). Sleep sacks are sized differently than clothing, so they will overlap different pajamas sizes, so I’ve ended up with both cotton and fleece sleep sacks in every size but one.
It’s always a good idea to have a cotton jacket on hand for chillier days, even in summer. In colder weather, I recommend having at least one fleece set–pants/jacket or pants/vest. Go for hooded rather than non-hooded, so you only have to deal with hats in particularly cold weather or on longer outdoor treks. (If you expect to spend a lot of time outdoors during cold weather, you may consider getting a winter coat. I didn’t buy a winter coat during Kaylie’s first year, even though we lived in Indiana at the time, because, well, I hate going outside….we did just fine in fleece sets covered with fleece bear suit and/or fleece blankets over the car seat.)
Now that I’ve given you my recommendations on how much to buy, I’m going to share my own preferences on which ones….
Onesies versus shirts: Shirts drove me nuts with Kaylie before she could walk. Every time I picked her up, the shirt would ride way up. I therefore had several adorable outfits that she ended up never wearing because I opted for onesies, which are so much easier. My advice is to stick with onesies until your little one is walking more than being carried; once they’re walking well on their own, shirts are much easier for diaper checks and changes.
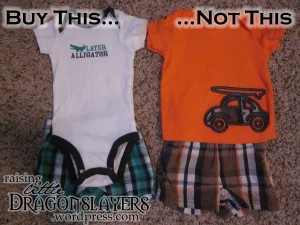
Get onesies, not shirts. Shirts ride up every time you pick baby up!
If you find you have too many short-sleeved onesies in a size your baby is only going to fit into in the dead of winter, here’s the solution: long-sleeved white onesies. Get a pack, put ’em under the short-sleeved onesies, and use those season-inappropriate outfits!
Pajamas: Go for snaps instead of zippers! We had so many pairs of pajamas that I hated using, and even ended up setting aside and replacing with ones I found easier to use. Think about it: Pajamas are for night-time use, so you want to be able get through those midnight diaper changes as quickly and easily as possible. You can unsnap pajamas from the bottom to the waist, but zippers must be pulled all the way down from the neck to the heel to get to the diaper.
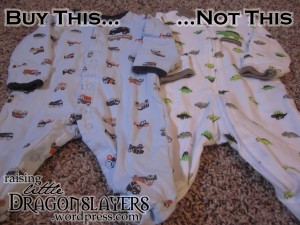
Get snaps, not zippers! Midnight diaper changes are enough hassle already.
Gowns: My two cents is to avoid infant gowns; they’re a great idea in theory, but the reality is that (with both my kids, anyway) babies tend to kick so much that gowns ride up to their hips. If you must try gowns, I’d opt for convertible gowns that can alternatively be snapped to form legs as well, though–as with all footless pajamas–the legs tend to ride up to the knees. At this point, the only pajamas that I ever use are cotton, snap-up, footed pajamas.
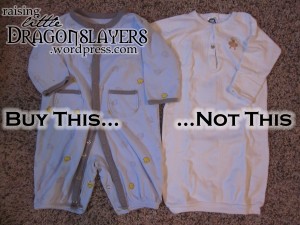
Or skip the gown altogether, and go for footie pajamas.
Bibs: Get Carter’s snap bib three-packs. You can find them at Target. I had tons of different kinds of bibs with Kaylie, and until I stumbled upon the snap bibs, every single one of them had some kind of Velcro closure. I started finding these awful scratches all over the back of Kaylie’s neck from the Velcro, so I started using bibs with less-bristly closures, but those ones stopped sticking together after only a few uses. I was so excited when my mother-in-law gifted us with a set of snap bibs! I hadn’t even known that was an option. They’re all I use now for Wil! (They also have a water-resistant layer between the fabric, which is very important! And, snaps won’t stick to the rest of your laundry; I have ruined a couple things by stupidly throwing them in a load that I forgot had a Velcro bib!)
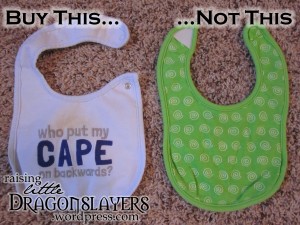
Get snaps, not Velcro! Both your baby and your laundry will thank you.
Socks: Sock are a royal pain. Baby socks do not like to stay on baby feet. I like theFaded Glory gripper socks at Walmart. They go up the calf a ways (ankle socks come right off), and the tread on the bottom serves a second purpose in that it also indicates what size the socks are (have you ever tried sorting through tiny socks to try and figure out which ones are tinier?).

Longer socks mean they won’t ride down off baby’s feet as quickly.
And now for more general advice:
Stick with a favorite brand or two. Different brands fit differently, and I had several outfits gifted for Kaylie that we weren’t able to use because I stored, say, an 18-24M outfit with other 18-24M clothing only to find later that that brand’s “18-24M” size fits more like a Carter’s “12-18M”. Avoid the hassle of having to eyeball–or worse, try on–every outfit to determine if it fits yet. For babies, I love Carter’s–the clothes are super cute, the sets are convenient, and you can usually find them on sale–while for toddlers, I love Carter’s and Jumping Beans (at Kohl’s). Find what fits your kid best, and stick with that.
Don’t skip NB! I had a lot of people tell me, “Oh, babies are never in newborn clothes (or newborn diapers) for long enough to bother! Just put them in 0-3 months!” Ha! Kaylie (born six pounds, five ounces) was swimming in NB when we brought her home, and she wore it for a month and a half. But Wil (born nine pounds) was out of NB by two weeks. There’s no way to know, really, how big your baby is going to be or how fast they’ll grow. If you can, save your money for the cute stuff in bigger sizes and stock NB with thrift-store finds, hand-me-downs, and borrowed clothes, cute or not, until your little one is out in the world and you have an idea of whether or not they’ll need to be in NB for a while.
Shop a size or two ahead. You don’t want to be buying the bulk of baby’s wardrobe the weekend before you bump him up a size–you may not be able to find the items you need, or, if you do, you may not be able to find it all at a good price. I’ve done that a couple times, and it never goes well (would you believe the Kohl’s around the corner quit selling long-sleeved shirts and only had summer clothes by the end of December? It was thirty degrees out!) I like to start shopping for the next size as soon as I bump Wil up to new size.
….But don’t shop too far ahead! Kaylie has always been small, so we go by weight to determine what size clothing to put her in, rather than months. To give you an idea of how “off” we are with her, we bumped her up to 18-24M clothes when she was 31 months, after spending a week shy of a year in 12-18M. So, that first year, it could be a little hard to determine what size we needed for an item to be “weather-appropriate”! We had a number of great winter outfits that she didn’t actually fit into until the following summer.
And don’t buy holiday outfits. Yes, they’re cute, but they’re almost never really worth the money (at least not new). You get very little use out of them. If you’re lucky, you’ll have awesome grandparents who gift things like that. (Exception: Buy what you need for holiday family pictures, if that’s something you do. You’ll be looking at that photo on the wall for the rest of your life.)
This might seem like overkill, but……I like to keep an Excel spreadsheet of what I’ve already bought. I can list, by size, what items I have, and I can note what goes together and what outfits are incomplete (e.g., a onesie that has no matching pants). I update it whenever I go shopping and bring home clothes, and print a copy of it off to keep in my diaper bag or purse to refer to whenever I’m out and I see a good deal. (I did this very faithfully with Kaylie; I’m slacking a bit with Wil. But when I keep up with it, it is super helpful–especially when thrift-store shopping, where clothes are often sold as individual items instead of sets.)
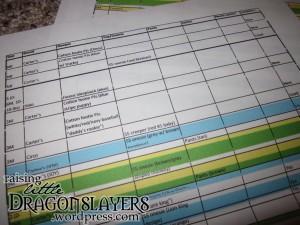
My OCD at work. It can come in handy sometimes.
As you shop, always picture yourself using an item. Will it be too difficult to get on and off? Do you need anything to go with it? Will it be season-appropriate? Can you picture yourself using it often?
Keep in mind, you can usually supplement beyond these basics once your little one is wearing the size in question. Even if that means you won’t get the best deal on what you need additionally, you’ll save more in the long run by not buying a lot of items you end up not needing. For me, this essentials-only list is usually enough to get me by. I hope it helps you as you consider what you and your little one will need!